Manual Creation |
  
|
Manual Creation |
|
To manually create an order entry, perform the following:
1.On the application home page, in the left pane, click Order Order Entry. The Order Entry workbench appears on the right pane like the one shown below:
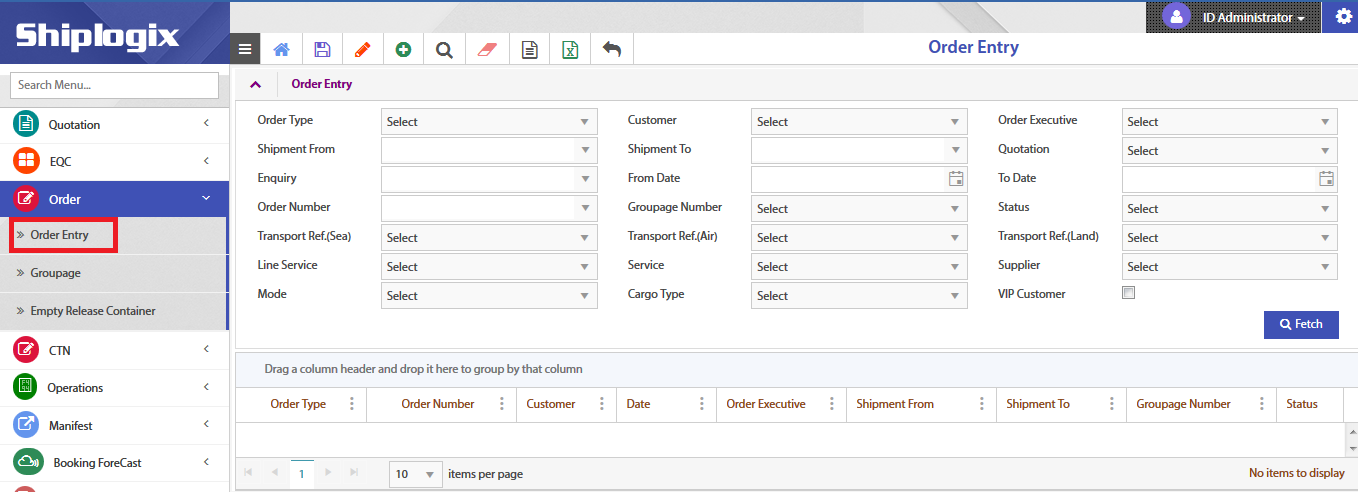
2.In the right pane, click Add (![]() ) icon in the Tool bar. The Order Entry creation page appears.
) icon in the Tool bar. The Order Entry creation page appears.
3.In the Basic Info header, provide the following details:
i. Choose Order Type from the drop-down list as Sea Export Order, Air Export Order, Port Release Advice, Groupage Entry, Sea Import Order, Order-Services, or Groupage Release.
ii. Choose Customer from the drop-down list.
iii. Choose Expected Date of order initiation using the date picker (![]() ) icon.
) icon.
Note: By default, the current date will be automatically populated.
iv. Choose Order Executive from the drop-down list.
v. Choose Shipment From and Shipment To details.
vi. Choose Requested Office from the drop-down list.

4.Click Expand/Collapse Sections.
5.In Routing & Transport references tag, perform the following:
i. Click add (![]() ).
).
ii. Choose Mode of transport from the drop-down list as AIR, RAIL, TRUCK, or SEA.
Note: Leg number will be automatically populated.
iii. Choose Responsibility for the order from the drop-down list as Us or Merchant.
iv. Choose Provider from the drop-down list.
v. Choose From location and To location of the transport.
Note: Duration and UOM will be automatically populated. You can also click Add Route to add route and transshipment, if required.
vi. Enter Transport Reference.
vii. Choose Departure Date using the date picker ( ) icon.
Note: By default, Status will be ACTIVE.

viii. Click save (![]() ) icon to temporarily save the routing and transport details.
) icon to temporarily save the routing and transport details.
6.In Equipments & Cargo Info tag, perform the following:
i. Click add (![]() ).
).
ii. Choose Unit Type, Basis (OPS), and Basis (Substitute) from the respective drop-down list
Note: By default, Serial number will be automatically populated.
iii. Enter Booked Quantity, Released Quantity, and Confirmed Quantity.
iv. Choose Empty Release office from the drop-down list.

v. Click save (![]() ) icon to temporarily save the equipment and cargo details.
) icon to temporarily save the equipment and cargo details.
7.In Cargo Info tag, perform the following:
i. Click add (![]() ). An Edit pop-up window appears.
). An Edit pop-up window appears.
ii. In the Edit window, perform the following:
a. Choose Main Commodity, Equipment Serial, and Package Type from the respective drop-down lists.
b. Enter No. of Packages, Gross Weight, Volume, Length(CM), Width (CM), and Height(CM).
Note: By default, Status will be ACTIVE.
c. Enable Hazardous if the goods is of hazardous nature.
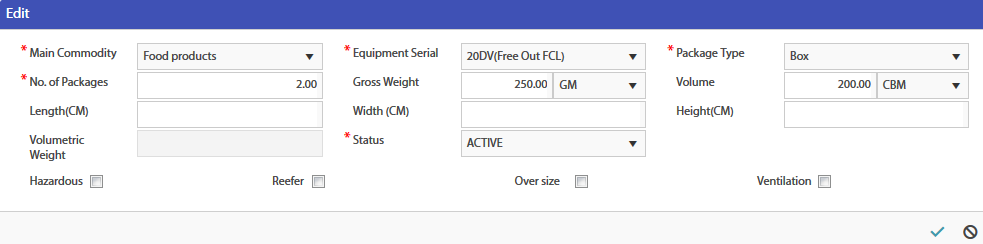
d. Click save (![]() ) icon to temporarily save the cargo details.
) icon to temporarily save the cargo details.
8.In Cost tag, perform the following:
i. Click add (![]() ).
).
ii. Choose Type from the drop-down list as Normal or Special.
Note: Route number will be automatically populated.
iii. Choose Charge Description, Payat location/Office, Basis Type, and Calculation Method from the respective drop-down lists.
Note: Base UOM and Quantity will be automatically populated.
iv. Choose Currency from the drop-down list.
Note: Exchange Rate will be automatically populated based on the chosen currency.
v. Enter Rate Cost and Rate Selling prices.
Note: Cost Amount, Selling Amount, Cost Base Amount, and Selling Base. Amount will be automatically populated based on the rate cost and rate selling amounts.
vi. Choose Mode Of Pay from the drop-down list as PREPAID, COLLECT, or NOT APPLICABLE.
vii. Enter Remarks, if any.
Note: By default, Status will be ACTIVE.

viii. Click save (![]() ) icon to temporarily save the cost details.
) icon to temporarily save the cost details.
Total Selling and Total Cost calculated will be displayed under the Services & Cost tag.

9.In Parties tag, perform the following:
i. Click add (![]() ).
).
ii. Choose Party Type from the drop-down list as Notify, Consignee, or Shipper.
iii. Choose Party Name from the drop-down list.
iv. Enter Address, Tel number, Fax number, and Email ID.
v. Choose Point of Contact (POC) from the drop-down list.
vi. In Controlling Party, enable it if the point of contact is the controlling party.
Note: By default, Status will be ACTIVE.

vii. Click save (![]() ) icon to temporarily save the party details.
) icon to temporarily save the party details.
10. In Additional Info. tag, perform the following:
i. Click add ( ![]() ).
).
ii. Choose Prompt from the drop-down list.
iii. Enter prompt Value.
Note: By default, Status will be ACTIVE.

iv. Click save (![]() ) icon to temporarily save the additional information.
) icon to temporarily save the additional information.
11. In attachment types tag under Attachments & Notes tag, perform the following:
i. Click add (![]() ).
).
ii. Choose Type from the drop-down list.
iii. In File Name, click Select files to select and upload the attachment.

iv. Click save (![]() ) icon to temporarily save the attachments.
) icon to temporarily save the attachments.
12. In notes tag under Attachments & Notes tag, perform the following:
i. Click add (![]() ).
).
ii. Choose Note Type from the drop-down list.
iii. Enter Notes.
Note: By default, Status will be ACTIVE.

iv. Click save (![]() ) icon to temporarily save the notes.
) icon to temporarily save the notes.
13. Enter Special Request, if any.
14. In the menu bar, click Save (![]() ) icon to save the order entry. A pop-up window appears.
) icon to save the order entry. A pop-up window appears.
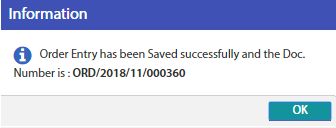
15. Click OK.