Creating a new Payable Invoice |
  
|
Creating a new Payable Invoice |
|
Steps to create a new Payable Invoice
Click the ![]() icon in the Toolbar. The Payable Invoice add screen will be displayed.
icon in the Toolbar. The Payable Invoice add screen will be displayed.
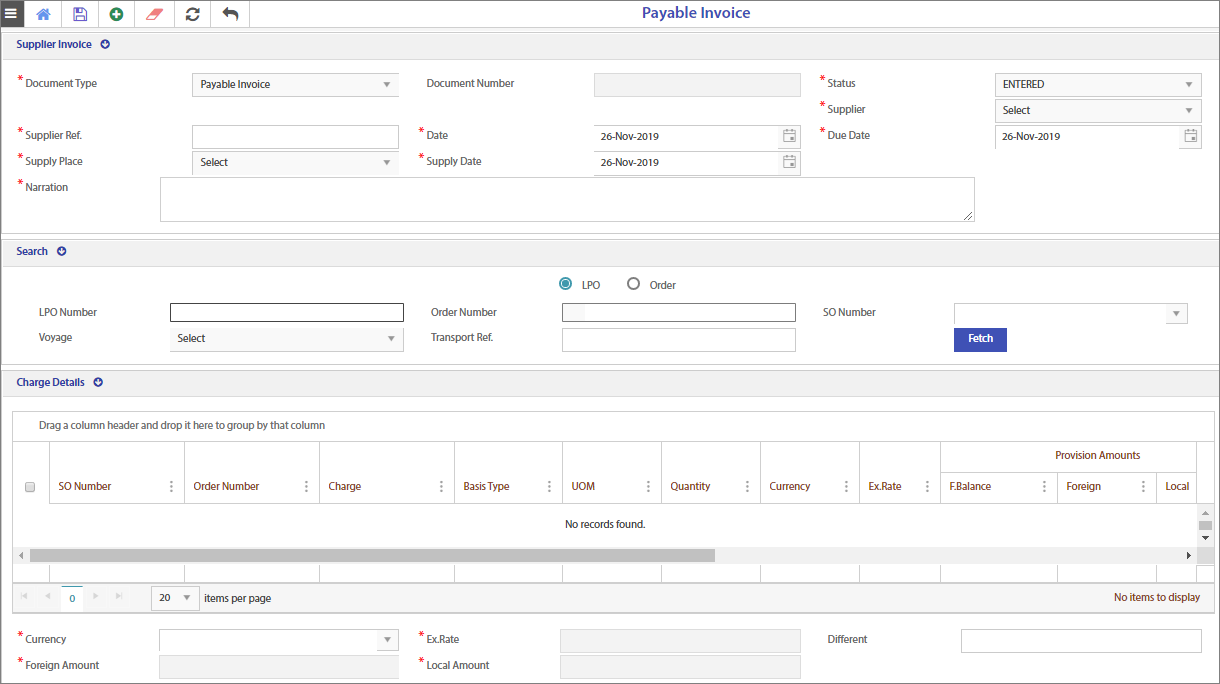
It includes three sections.
i.Supplier Invoice
ii.Search
iii.Charge Details
Enter the required information in the Supplier Invoice section.
1.Supplier Invoice

Enter the required inputs as below.
1.Select the Document Type from the drop-down list. It refers to ??
2.Document Number will be generated automatically based on the document type selected, while saving the record (and is shown disabled by default).
3.Status field displays Entered by default. This status refers to the status of the invoice that you are going to create.
4.Select the Supplier Name from the drop-down list. Supplier refers to the active vendors stored in the business partner master.
5.Enter the Supplier Ref.
6.Select the Date & Due Date from the respective drop-down calendars. This date refers to the date ??
7.Due date will be calculated based on the Document Date and credit days defined for that particular supplier.
8.Select the Supply Place from the drop-down list. This field is mandatory for GST enabled companies. Based on the company's billing address, the state name will be displayed in the LOV. In case more than one billing address exists, you need to select the correct billing location from the LOV.
9.Select the Supply Date from the drop-down calendar.
10.Enter the Narration in the column provided.
2.Search section

You can create the payable invoice via Order or LPO.
You can either create the invoice for the full amount or for the partial amount.
Payable Invoice creation via LPO,
•Select the LPO option.
•LPO status must be in Created status.
•The records are fetched from the LPO tables where the balance LPO amount is not equal to zero and also based on the other user selected parameters (supplier/LPO number or set of LPO numbers/SO number, etc.)
•To create invoice for the full amount, the balance clearance flag is ticked automatically and the corresponding LPO balance filed will be updated with zero.
•To create invoice for the partial amount, the balance clearance flag is ticked automatically and the corresponding LPO balance filed will be updated with Current LPO balance minus invoiced amount
Payable Invoice creation via Order,
•Select Order option.
•Order status must be in Confirmed status.
•The records are fetched from the Order Rate tables where the balance amount is not equal to zero and also based on the other user selected parameters (supplier/LPO number or set of LPO numbers/SO number, etc.)
•To create invoice for the full amount, the balance clearance flag is ticked automatically and the corresponding Order balance filed will be updated with zero.
•To create invoice for the partial amount, the balance clearance flag is ticked automatically and the corresponding Order balance filed will be updated with Current Order balance minus invoiced amount.
Notes:
✓Tax amount will be calculated automatically based on the Supplier Tax charges defined in the tax master. Refer invoice entry BRS for details on tax calculation.
✓Upon saving the invoice, invoice amount by each charge should be inserted along with the supplier invoice number in to the order rate details with the cost amount (selling amount should be zero). Also this new record should carry the parent key of the original charge record.
Steps to enter the inputs are given below:
•Select the requried radio button LPO or Order.
•Enter the LPO number if you have selected LPO. The LPO numbers will be listed for the particluar supplier if selected. You can select single or multiple LPOs from the LOV.
•Enter the Order number if you have selected Order. If the supplier is selected then show the confirmed orders based on that particular supplier, else show all the confirmed orders. You can select single or multiple Order numbers from the LOV.
•Select the SO number from the drop-down list. So number refers to the number assigned to the selected vendor.
•Select the voyage. The distinct voyages are displayed from the order where the orders are in confirmed status.
•Enter the Transport Ref.
•After entering the required inputs, click the fetch button to fetch the details from the voucher tables.
3.Charge Details

This section includes the below mentioned columns.
SO number refers to the SO number of that particular charge from the order service header table.
Tax Detail button
To see the breakup of the tax charges, click this button placed next to the total tax amount field.