Using Rate Checker |
  
|
Using Rate Checker |
|
To create an order entry using rate checker, perform the following:
1.On the application home page, in the left pane, click Order Order Entry. The Order Entry workbench appears on the right pane like the one shown below:
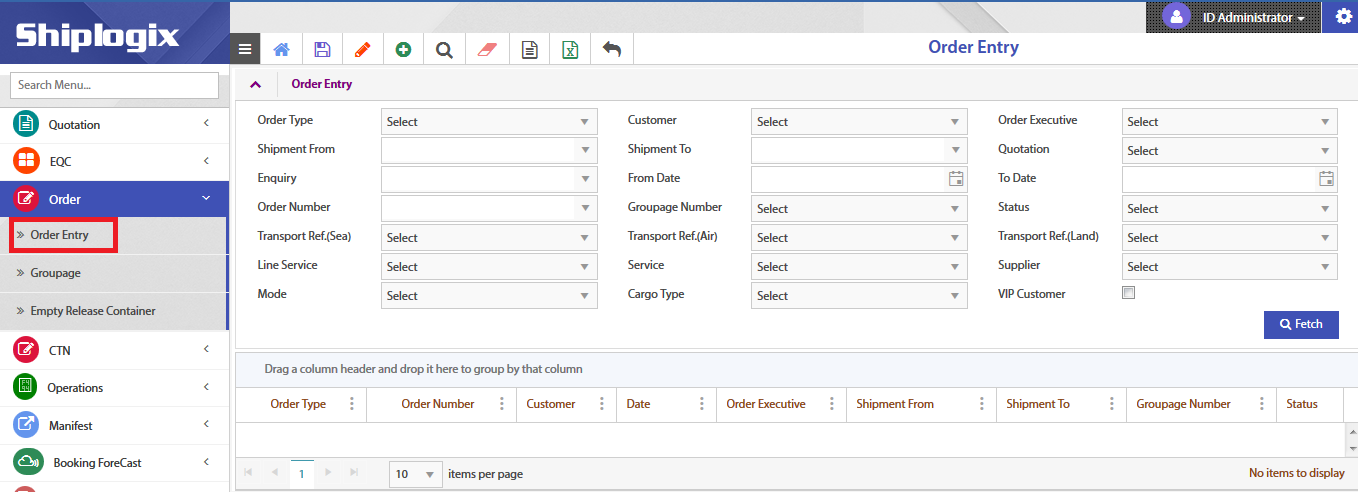
2.In the right pane, click Add (![]() ) icon in the menu bar. The Order Entry creation page appears.
) icon in the menu bar. The Order Entry creation page appears.
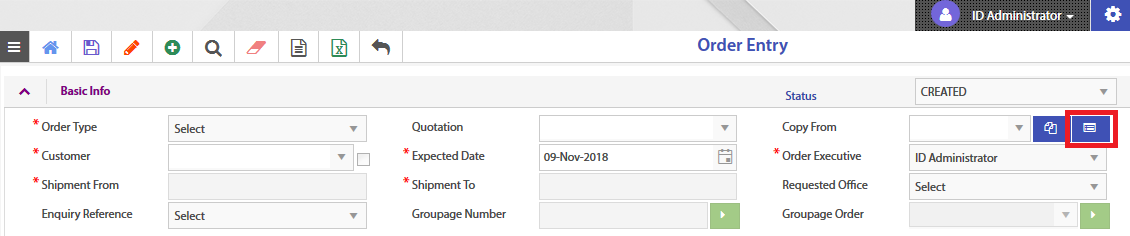
3.In the Basic Info header, click Rate Checker (![]() ) icon. You will be redirected to the Rate Checker creation page.
) icon. You will be redirected to the Rate Checker creation page.
4.Choose the required Mode of transport as SEA, TRUCK, RAIL, AIR, or ALL.
5.Choose Customer from the drop-down menu.
6.In Shipment Planned, choose the date of shipment using the date picker (![]() ) icon.
) icon.
Note: The Week will be automatically populated based on the chosen date.
7.Choose From Place and To Place of shipment from the respective drop-down lists.
8.Choose Shipment Type from the drop-down menu as Normal, OOG, Reefer, or IMO.
9.Choose Commodity from the drop-down list.
10. Enter Length, Width, and Height of the commodity.
Note: Vol.Weight will be automatically populated based on the length, width, and height.
11. Enter Gross Weight and Gross Volume.
12. In Basis Type/Quantity, choose the basis type from the drop-down list and enter the quantity.
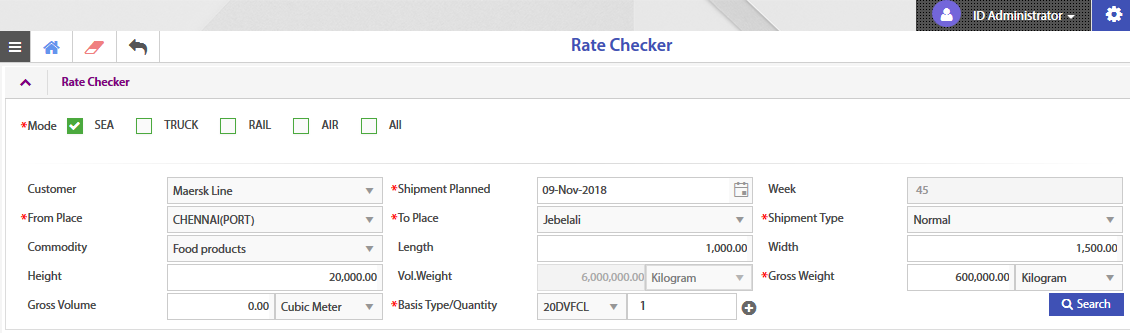
13. Click Search. The transportation rates for the shipment will be displayed below.
14. Choose the best rate from the list of tariffs.
15. Click Add to Order to generate an order entry.
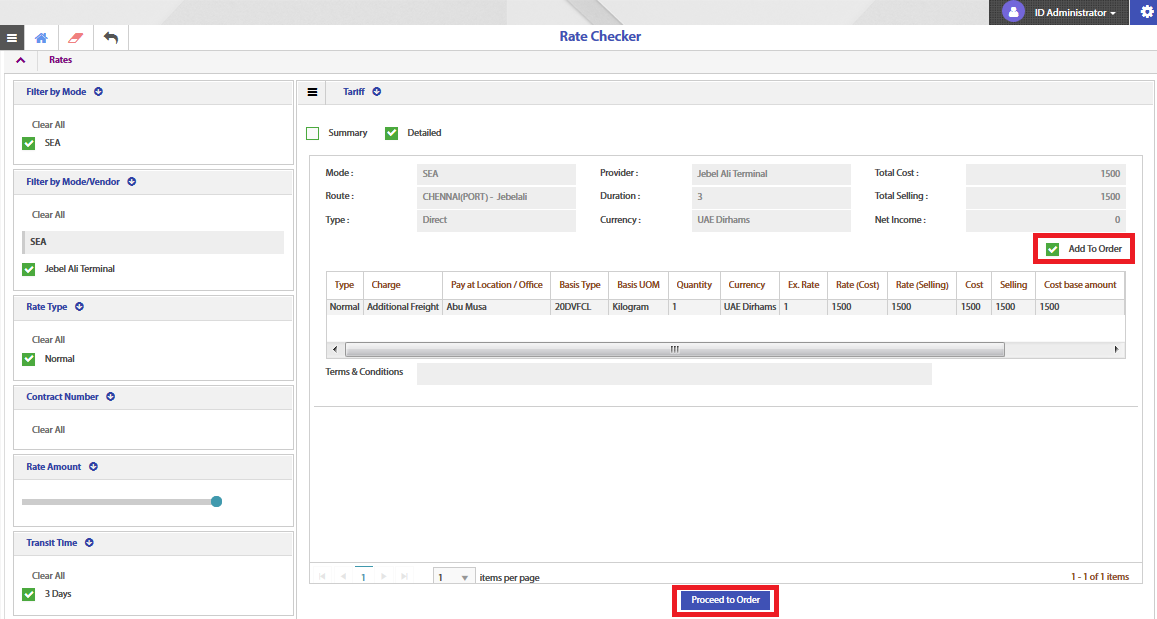
16. Click Proceed to Order. You will be directed to the Order Entry page.
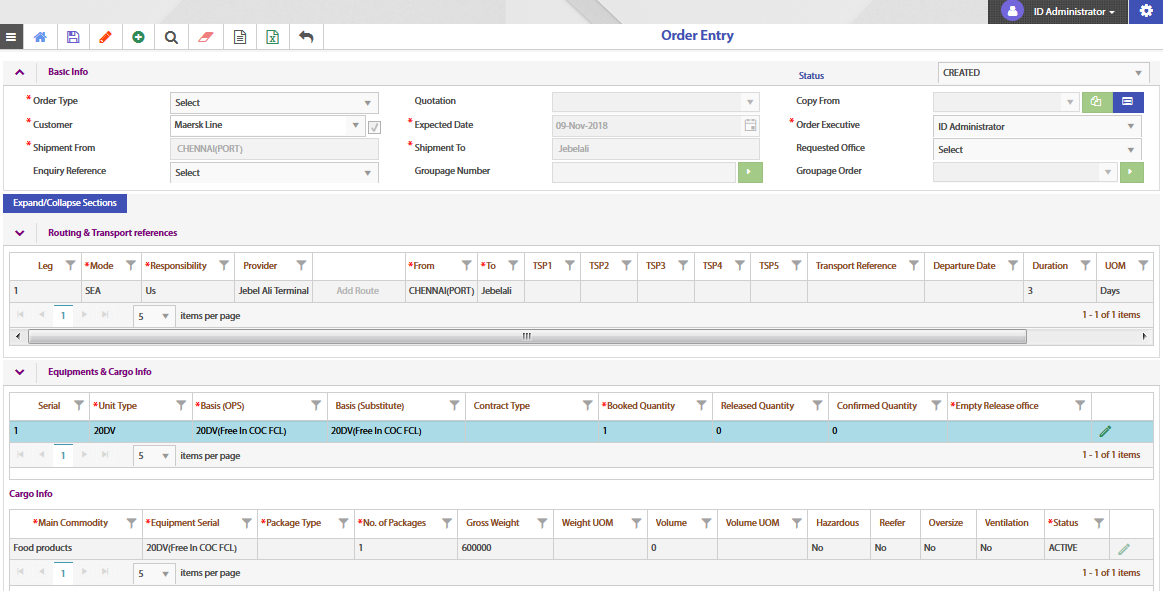
17. In the Basic Info header, choose Order Type from the drop-down list as Sea Export Order, Air Export Order, Port Release Advice, Groupage Entry, Sea Import Order, Order-Services, or Groupage Release.
18. In the menu bar, click Save (![]() ) icon to save the order entry. A pop-up window appears.
) icon to save the order entry. A pop-up window appears.
19. Click OK.