Defining Commission in Setup |
  
|
Defining Commission in Setup |
|
In the Commission Setup screen, click the ![]() icon in the Toolbar. The Add screen will be displayed.
icon in the Toolbar. The Add screen will be displayed.
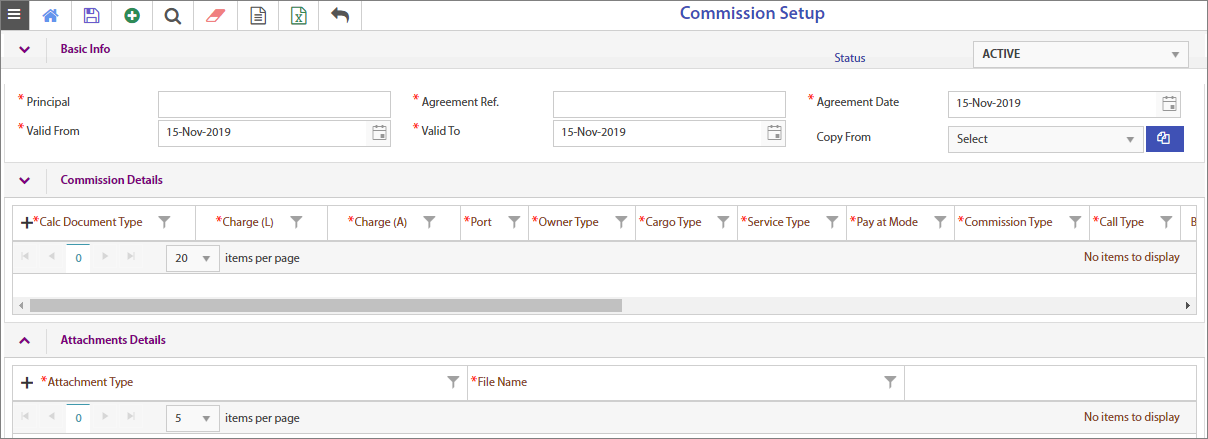
It displays the 3 sections:
1.Basic info
2.Commission Details
3.Attachments Details
1.Basic Info
i.Select the Principal.

The Agreement Date, Valid From and Valid to dates will be auto-updated.
ii.In Copy From, select the Principal from the drop-down list and click the ![]() button to copy the details of the selected Principal.
button to copy the details of the selected Principal.
2.Commission Details
You can add the charge details in this section.
i.Click the ![]() icon in the grid. The Charge Details window appears.
icon in the grid. The Charge Details window appears.
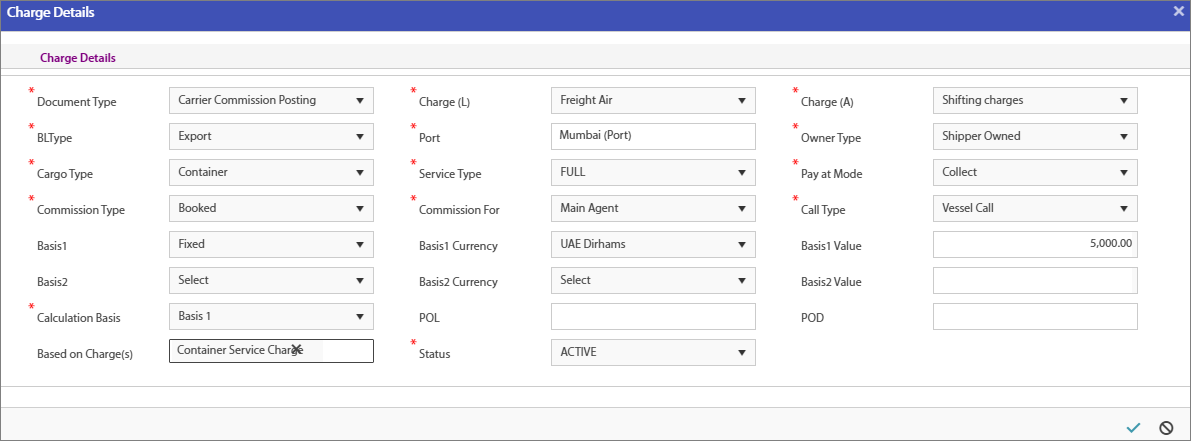
ii.Enter all the mandatory fields and click the ![]() icon. The data will get added in the main screen as below.
icon. The data will get added in the main screen as below.

iii.Now, click the ![]() icon in the Toolbar to save the information. A confirmation message will be displayed as below.
icon in the Toolbar to save the information. A confirmation message will be displayed as below.
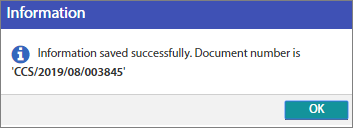
iv.Click OK.
3.Attachments Details
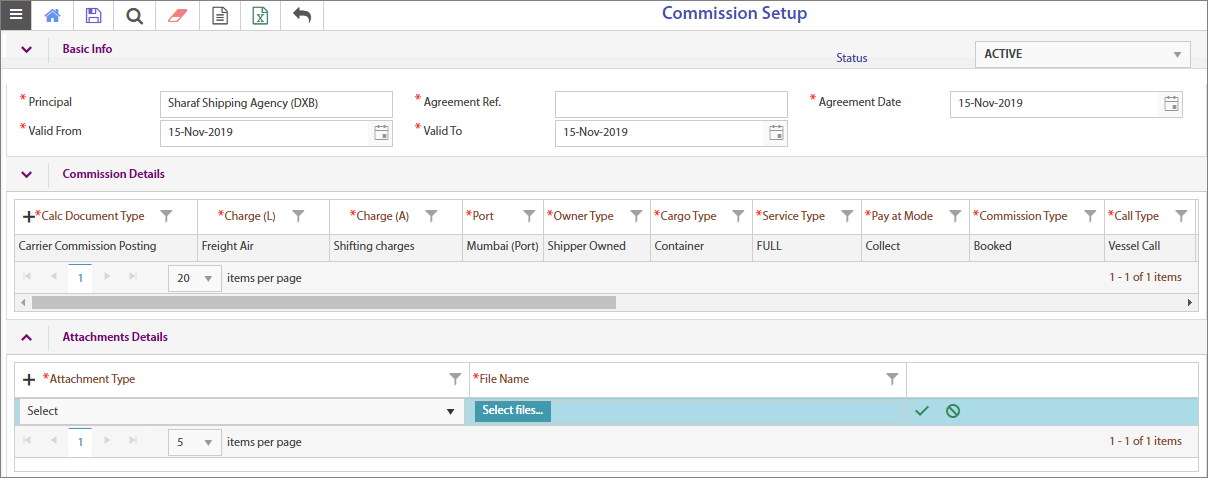
i.Click the ![]() icon in the grid. A new row will get inserted.
icon in the grid. A new row will get inserted.
ii.Select the Attachment Type from the drop-down list.
iii.Click the ![]() button, select the file from the system to upload.
button, select the file from the system to upload.
iv.Click the ![]() icon in the grid to save the file.
icon in the grid to save the file.
v.Finally, click the ![]() icon in the Toolbar to update the record.
icon in the Toolbar to update the record.