Sales Conversation |
  
|
Sales Conversation |
|
This feature is used to update the details of the conversation that happen during the sales visit or meeting. Users can view, edit and add conversation.
Viewing the Conversation
In the left Navigation pane of the Application Homepage,
1.Click Sales Operation >> Sales Operation Entry. The Sales Operations Workbench is displayed.
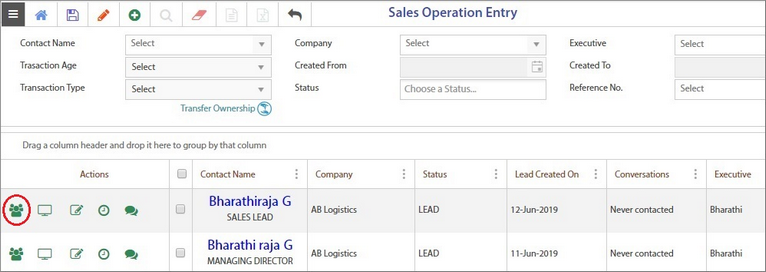
2.Click the Conversation icon (shown highlighted) corresponding to a particular sales operation.
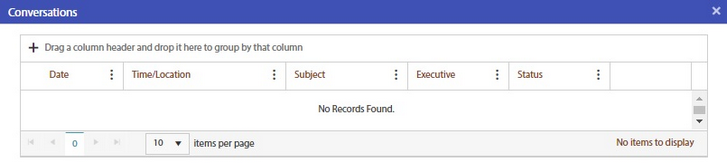
The previously saved conversations for a particular sales operations record/business partner record will be displayed (in the descending order of the date).If there is no existing conversations (No records), the screen will be displayed as below.
Adding Conversation details
1.Click the Add (![]() ) icon. The Edit screen is displayed.
) icon. The Edit screen is displayed.
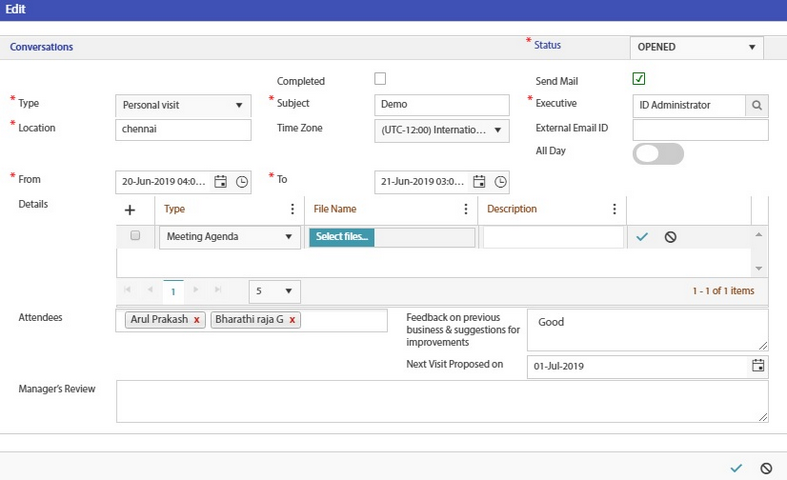
By default, the Status is OPENED.
2.Enter values in all the mandatory fields as mentioned below.
•Type - Select the type of conversation as Telephone call, email or personal visit from the drop-down list.
•Subject - Enter a subject name for the conversation.
•Executive - Login user name is displayed by default.
•Location - Enter the place of visit or meeting.
•Time zone- Select the timezone of the region from the drop-down list.
•External Email id - Enter the mail id of the recipient. This field is mandatory only if Send Mail check box is selected.
•All Day - Enable this option if the meeting is scheduled for the whole day, else you can select the date and time from the From and To fields.
Note: If All day option is selected, the From and To fields will get disabled.
Details section
3.Click the Add (![]() ) icon to enter more details and upload the required files. Enter the details in the fields as below.
) icon to enter more details and upload the required files. Enter the details in the fields as below.
•Type - Select the type of meeting from the drop-down list.
•File Name - Upload the file relevant to the meeting.
•Description - Enter the proper details if any.
Notes:
✓At least one parameter File Name or Description is required to mark the status as completed.
✓The fields Attendees, Feedback, Next visit schedule and Manager's review are optional.
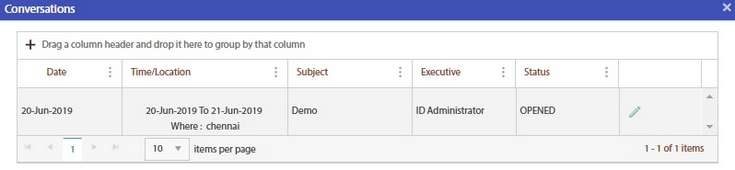
4.Click the Save (![]() ) icon to save the conversation details. Once saved, the conversation details are updated and displayed as in the below image.
) icon to save the conversation details. Once saved, the conversation details are updated and displayed as in the below image.
Editing the Conversation details
1.Click the Conversation icon corresponding to a particular sales operation. The below screen is displayed.
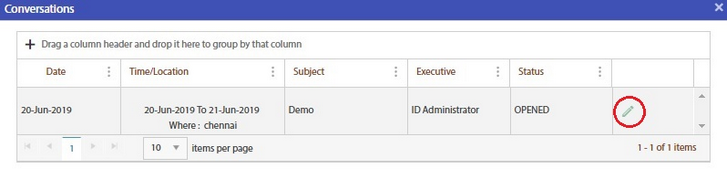
2.Click the Edit icon. The Edit screen is displayed.

3.Edit the details and click Save.
Rescheduling the Conversation
1.Click the Reschedule option (shown highlighted). The below dialog box is displayed.
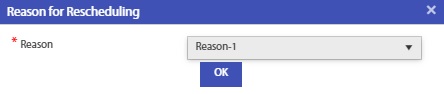
2.Select the reason for reschedule from the drop-down list.
3.Click OK.
4.Click the Save (![]() ) icon to save the conversation details.
) icon to save the conversation details.