Business Volumes |
  
|
Business Volumes |
|
This screen enables the user to set up business volumes. Users can view and edit the business volumes.
To understand business volumes, first refer business volume setup & Dynamic Definition.
Editing or Updating Business Volumes
In the left navigation pane of the Application homepage,
1.Click Sales Operation >> Sales Operation Entry. The Sales Operations Workbench is displayed.
2.Click the Add (![]() ) icon in the menu bar of the Sales Operations Workbench. The Sales Operation Entry screen is displayed.
) icon in the menu bar of the Sales Operations Workbench. The Sales Operation Entry screen is displayed.
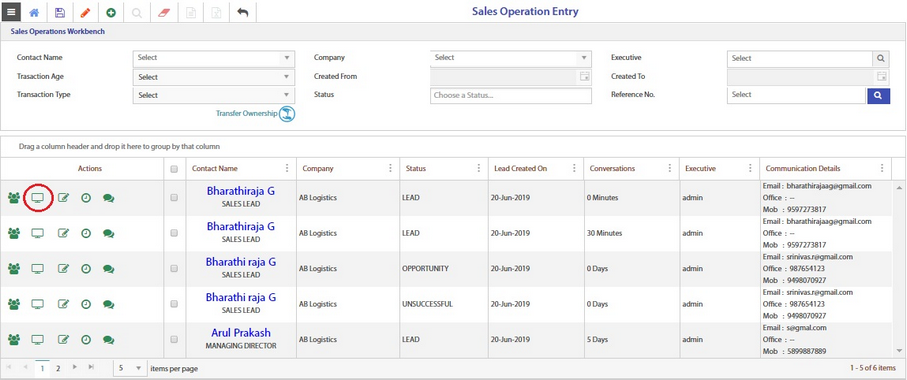
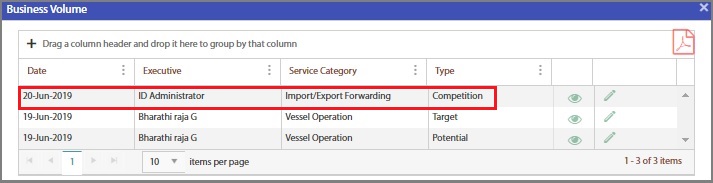
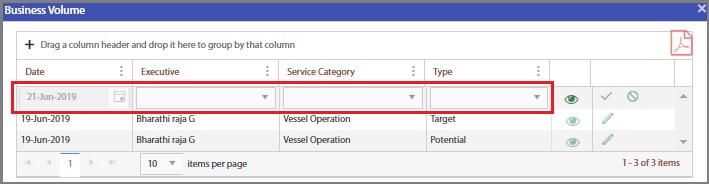
3.Click the Business Volumes icon (shown highlighted) corresponding to a particular sales operation. The existing business volumes are displayed as shown in the below image.
4. Click the Edit icon. The view icon is enabled now.
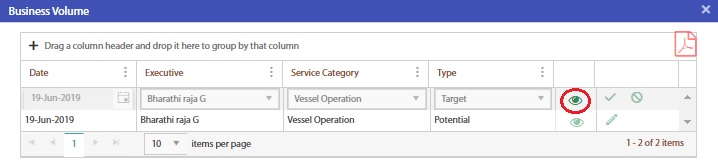
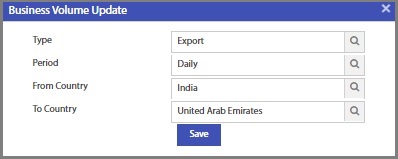
5.Click the View icon (shown highlighted). The Business Volume Update screen for the selected type Target is displayed.
6.Edit the data and click Save to save the business volume.
Understanding Business volume setup
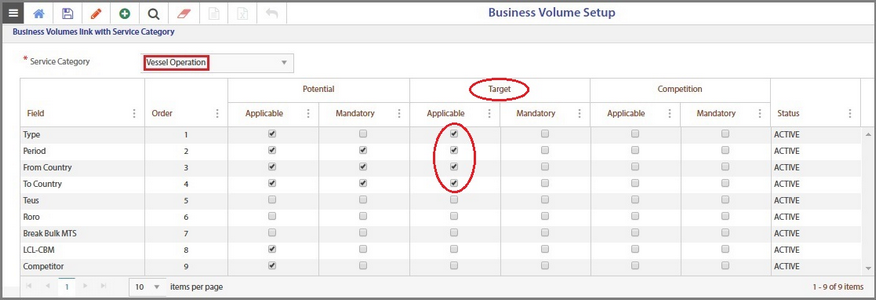
The fields displayed in the Business Volume Update screen are pre-defined in the Business Volume Setup screen. Refer Business volume setup for more details.
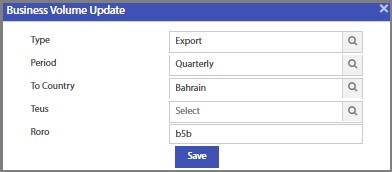
For Vessel Operation as the Service Category and Target as the Type, the below fields are marked as Applicable and the same are listed in the above Business Volume Update screen.
•Type
•Period
•From Country
•To Country
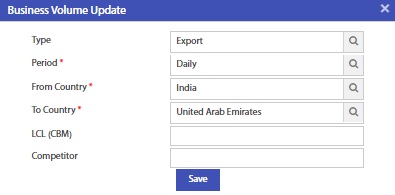
Similarly, for Vessel Operation as the Service Category and Potential as the Type, the below fields are marked as Mandatory.
•Period
•From Country
•To Country
and the below fields are marked as Applicable
•Type
•LCL (CBM)
•Competitor
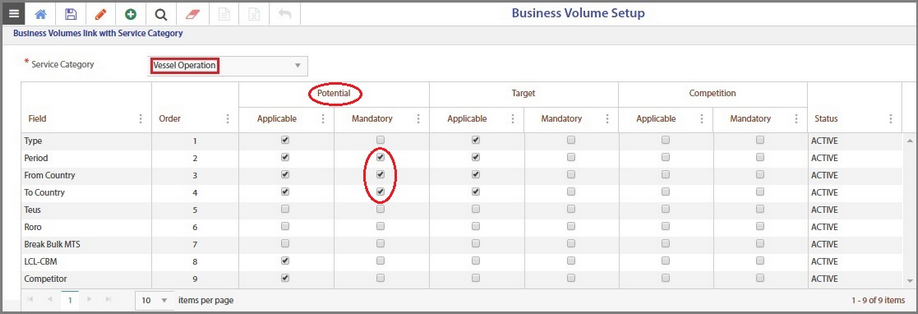
The same is listed in the Business Volume Update screen of Vessel Operation & Potential type.
Adding new business volume
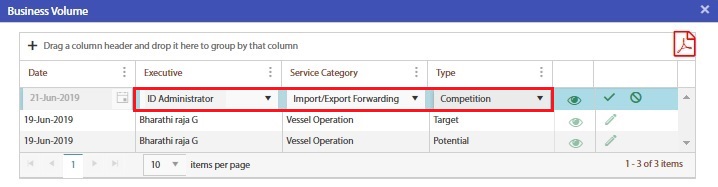
1.In the Business Volume Screen, click the Add (![]() ) icon. A new row is added before the existing entries.
) icon. A new row is added before the existing entries.
2.Select the name of the Executive, Service Category and the Type from the drop-down list.
3.Click the view icon. The Business Volume Update screen is displayed.
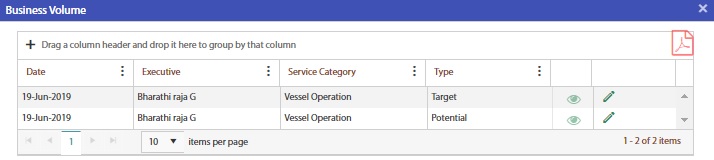
4.In all the fields, select the values from the drop-down list. Click Save. The newly added business volume is updated in the Business volume screen as shown in the image below.